Gallery walls are such a classic design element for interiors, yet they can be intimidating and time consuming! As designers, we are often tasked with creating gallery walls for our clients. Keep reading to find out some of our tips and tricks!
The first thing to think about when planning for a gallery wall is what type of style you are going for. Do you want a more eclectic look, or something more uniform? Gallery Walls can be anything from a group of family photos to a collection of prints, paintings and sculptural accents. The possibilities are endless! Now, you can even buy sets of prints to create a quick and easy gallery wall that still looks beautiful.
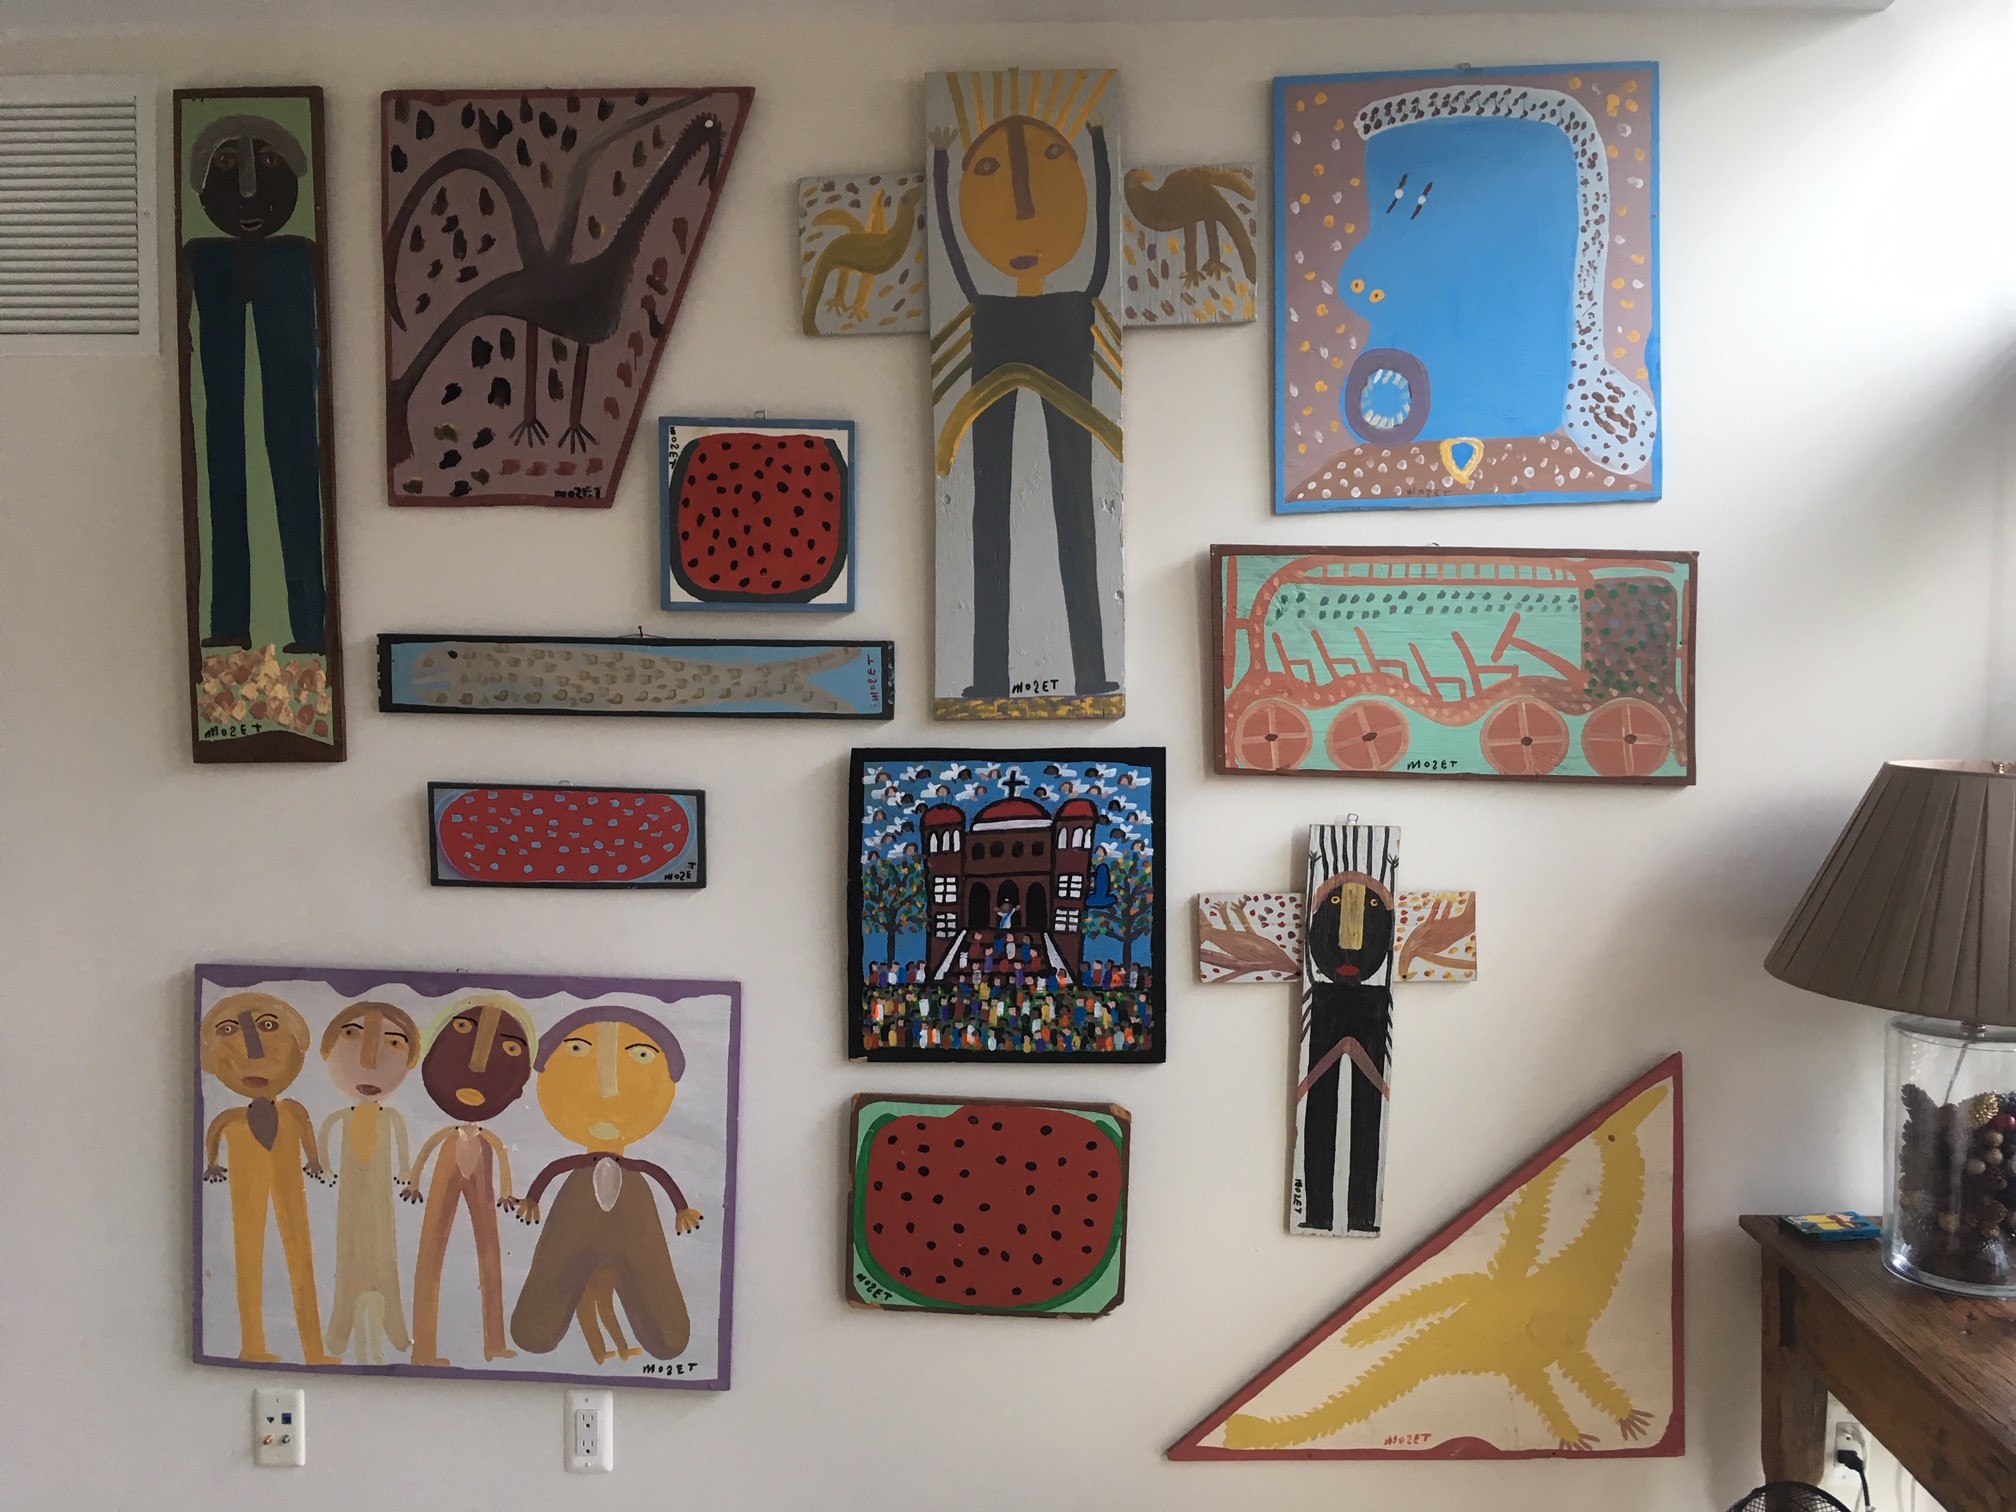
Our favorite way to create a gallery wall, however, is to use your own collections of art and items. This makes your gallery wall unique and gives a curated look. We recommend utilizing personal collections to showcase your personality. If you want to start fresh, start collecting items with a color scheme and scale in mind. (Designer tip: add in some circular or organic shapes to your wall to add some extra interest) Ask yourself whether you want varying sizes on your wall or if you want to stick to a more uniform look with all the same sized pieces. Another thing that is very important is the size of the wall you are planning to use. This will affect the size of the pieces you need as well as the number.
If you are going for a uniform look, an even number of frames/ arts will work well. If you are going for a more eclectic look, think about doing an odd number of varying sizes and shapes.
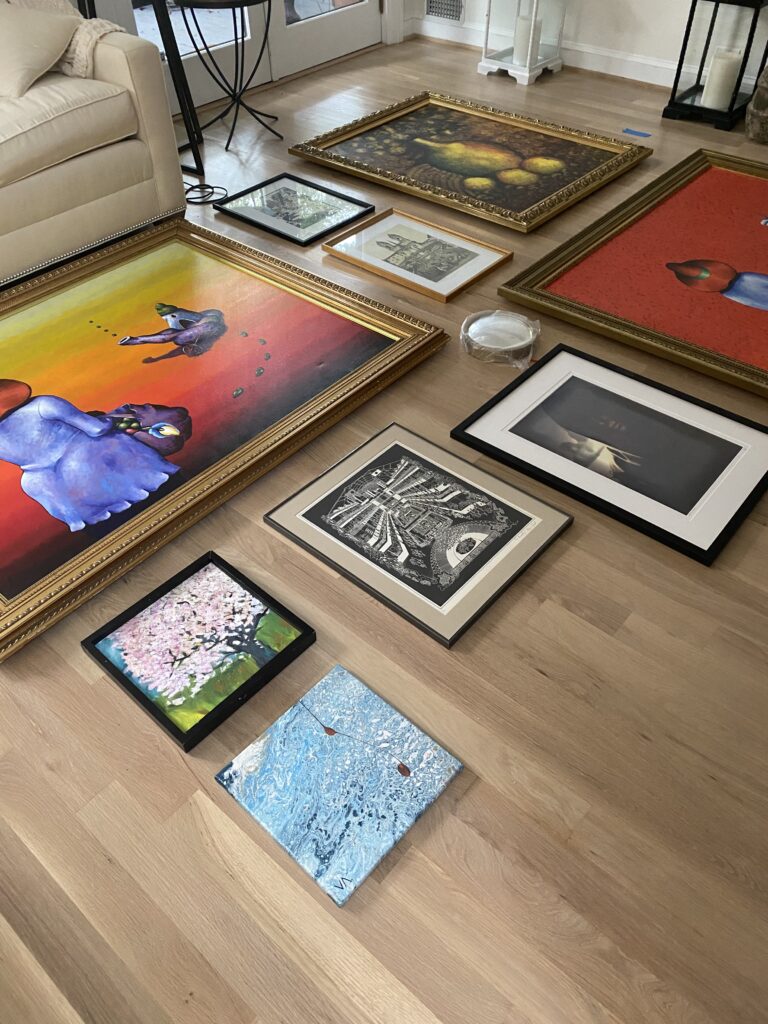
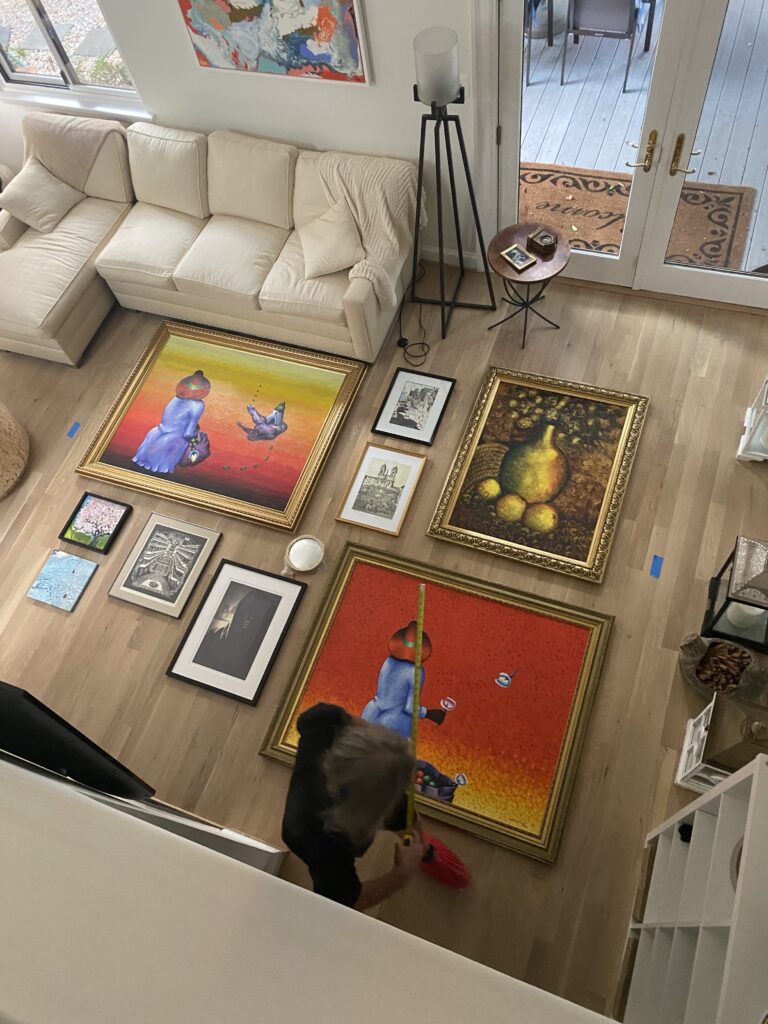
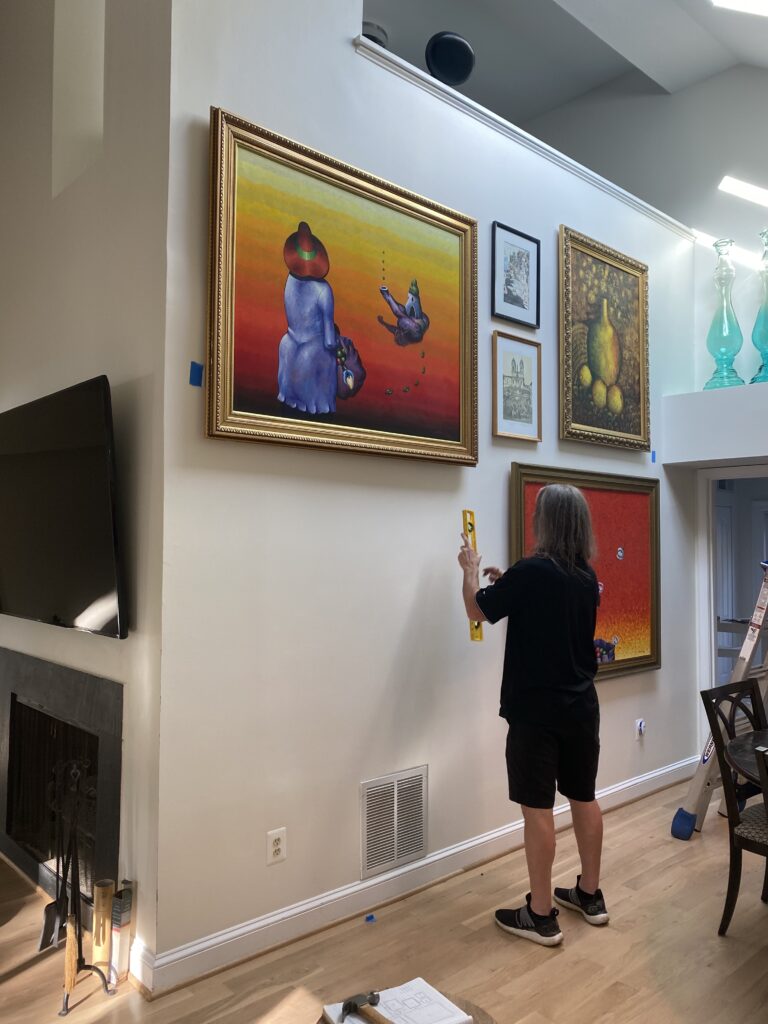
When you have selected your pieces, find a place where you can lay them all out to determine the arrangement. Start with your large items first! Once you have your large pieces set, you can see what other areas you have available to fill. We recommend marking out the dimensions of the wall on the floor so you can figure out accurate dimensions between the pieces as well as where the painting will hang in relation to the wall. (Designer Tip: For more uniform gallery walls, make sure you have equal spacing between each piece. Even for your eclectic arrangements, we recommend having equal spacing where possible.)
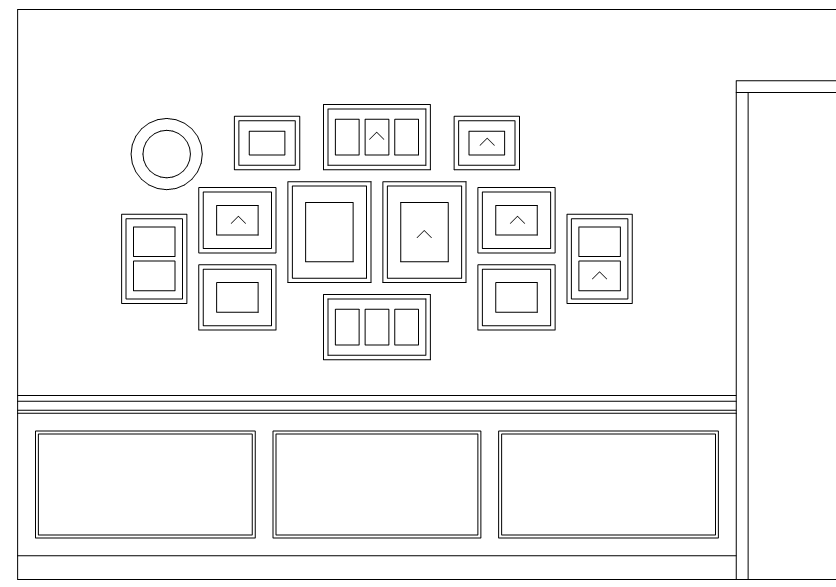
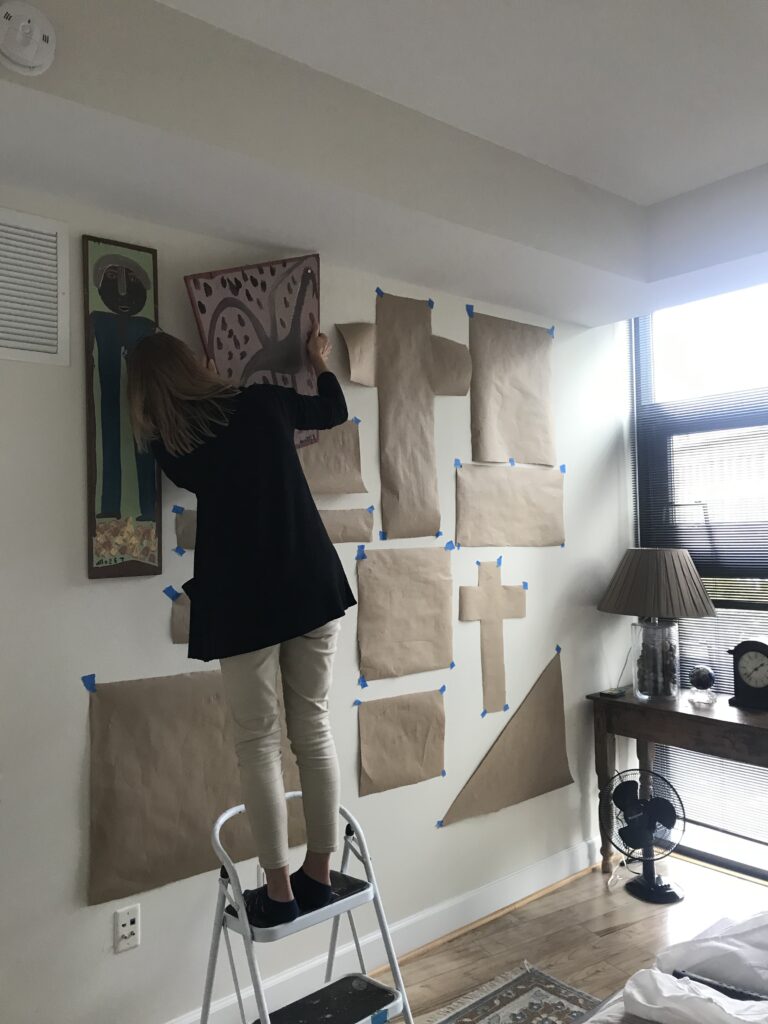
Sometimes, we don’t have our clients’ pieces on hand when we are determining arrangements, so this next step is essential. We make sure we have photographs and sizing of all the pieces (width and height), and we make paper templates. We determine the arrangement the same way as with the actual paintings except with the templates instead (we reference the images of the pieces to make sure we like the arrangement that way as well). Even if you have can lay out your pieces on the floor, we still recommend doing the paper template method. This way you can tape up the paper template on the wall in the precise location. (Designer Tip: you can also mark the location for the nail on the paper template, hang it on the wall, then rip the paper off when complete. That way you can be more precise!)

We want to hear your thoughts on gallery walls! How do you like to display your artwork and family photos?
Stay Inspired!
The Margery Wedderburn Interiors Team
